
Creating a Winning Recruiting Video
Knowing how to video and what to video can create a lot of angst. In this article, you will learn what to include and how to create a winning video that can be shared via text, email or shareable link to a free video platform storage service. Keeping things moving and short is key to having the viewer watch and re-watch your entire video. Music is not necessary and distracting. Coaches want to hear the sound of the strike!
With today’s cell phone cameras, it is quite easy to film (and edit if needed) your golf swings and a short hello introduction by yourself or with the help of a friend or parent acting in the role of videographer. Uploading your video to You Tube, Vimeo or another shareable video source is usually quite simple as well directly from your phone. Make sure you check the box for a shareable link to the video that you can share on your profile as well as send to a coach in email or text.
1. Start with a short hello (I am John Smith, class of 2022. Thanks for watching my video.) Or simply add a screen at the beginning with name and grad year. Wear golf clothes please!
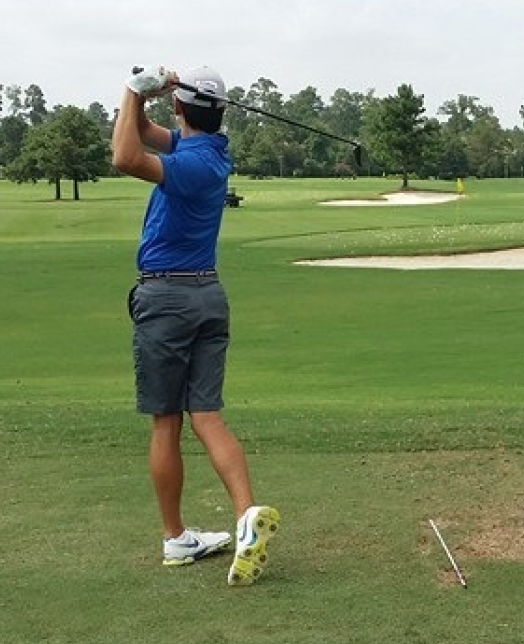
2. For filming, there are two main video angles when it comes to your golf swing: Face On (directly across from the player’s face) and Down the Line (aiming the camera from behind you to the target). There are reasons for both angles regarding analyzation. Face-On shows posture, grip, body position and impact. Down the Line shows the golf swing, posture, aim and where the ball starts in relation to your aim.
3. The video particulars: Positioning the camera/phone is probably the most important for showing the golf swing properly. (You only need 1, maybe 2 at the most, swings of each position.) Slow motion is not needed and distracting. With technology, it is very easy for the viewer to slow down the video and replay. Full motion is important!
4. Face On: Zoom in as much as possible, but double check you are capturing your entire club through out the swing. Don’t cut your club at the top or finish. To test your camera angle is correct for Face On, simply stand up straight after you are in your golf posture and look at the camera. If you don’t have to turn right or left to “face” the camera, then you are good to go.
5. Down the Line: Set the camera between chest high and hip high on an imaginary line halfway between the ball and feet. Just like the Face On, make sure zoomed, yet far enough away so entire club is visible throughout the swing. You can use an alignment stick on your feet line and ball line if you like, but not necessary. Seeing a target in the distance is great.
6. Which clubs and how many of each?
As stated earlier, don’t over video. Having 1 of each or 2 at the most is sufficient with each club and position (face-on, down the line).
Full speed please! The coach can always slow down the video if they want. Give them full speed and they can decide what to do with it.
Videoing some on the golf course is a bonus, but the driving range/pitching area/putting green will work as well.
- Driver
- 7-iron
- Pitching Wedge
- Approach Wedge (50-70 yards)
- Pitch Shot (20-30 yards)
- Bunker Shot (10-15 yards)
- Chip Shot (5-10 yards)
- Long Putt (40 feet)
- Short Putt (4 feet)
The above will be 18 shots (one face-on and one down-the-line of each). If you want to add a few extra from the golf course, that is fine. However, don’t overload your video as the shots can easily be replayed by the viewer. A goal might be to keep the video between 2-3 minutes. It is easy to trim and cut out the extra “dead” time (maybe keep 2-3 seconds between each shot) to keep the video moving.
If the driving range is closed, but you are able to get out on your golf course, perhaps film your shots on a hole and include audio on why you are choosing the club and type of shot. Example: This is a 380 yard dogleg right Par 4. (Vidoe yourself using a laser to determine the distance through the fairway.) The run out thru the fairway is 240 yards. I am using …club to position myself…from the green. Approach shot: (Use a laser to determine the distance) I have 135 to the front of the green and 148 to the pin. The pin is close to the right side. The green slopes right to left. I am going to land my approach 5 yards left of the pin and just under hole high to guarantee an uphill putt for birdie. Even if I end up a bit more left, that is the best position as missing the green to the right of the pin is a difficult up and down. Then proceed accordingly with the next shot…hopefully a birdie putt, but if it is a chip or pitch you can explain that. The video of the entire hole will take about 2-3 minutes. Extra Credit if you have a yardage book and know how to use! Extra, Extra Credit if you know how to make your own yardage book and know how to use it!
While this video will give the coach insight into your golf game, there is an added bonus! By learning to do this, you will become a better player with better course management. End result, lower scores coming your way in competition!